Crypto Token Escrow V2
Thank you again for purchasing Crypto Token Escrow. Crypto Token Escrow is a 100% decentralized Web3 Escrow application supporting any type of ERC20, BEP20, TRC20 and similar tokens following those standards. You don't need to be the token owner. This application/script will be able to interact with any tokens deployed to any EVM networks.
Just copy the token address deployed to the network and add the address to this script and deploy it. Start the business and earn money.
Installation
Crypto Token Escrow is actually a package of two different applications. One is smart contracts for EVM blockchains. Another is web3 app interface to interact with the blockchain. Please follow below sections step by step carefully.
Prerequisites
-
Basic Ethereum knowledge and a couple of minutes to follow this doc.
-
The latest nodeJS LTS (v18 recommended) installed locally and node and npm are accessible from terminal/cmd/Powershell. References: Windows 10, Ubuntu, macOS
- pnpm installed and accessible from terminal. Install pnpm using npm
-
An API key from Alchemy. Reference: Alchemy API Key. Do not worry about pricing. Start with the free plan. They won't force you to pay.
- Please ensure you collected the only API Key. Not Http or Websocket url.

- Advance: If you have your own node and RPC or other RPC, please feel free to contact us. We will guide you to use those with Crypto Token Escrow.
- Please ensure you collected the only API Key. Not Http or Websocket url.
-
A WalletConnect Cloud project id to enable WalletConnect V2 SDK. Head over to WalletConnect Cloud to sign in or sign up. Create (or use an existing) project and copy its associated project id.
-
KEY, SECRET and Bucket name from Filebase. Just sign up and get the KEY and SECRET from the sidebar "Access Keys" menu. Also create a Bucket and remember it. Follow the links Creating a Bucket and Access Keys. Don't worry about pricing. It's providing an insane amount of resources for free.
-
A Chain ID of a network where you want to deploy the smart contract. Supported networks and chain ids...
Network Chain ID Ethereum 1 Goerli 5 OP Mainnet 10 Flare Mainnet 14 Coston 16 Songbird Mainnet 19 Cronos 25 Telos 40 Telos 41 XinFin Network 50 Apothem Network 51 BNB Smart Chain 56 Syscoin Mainnet 57 OKC 66 Binance Smart Chain Testnet 97 Gnosis 100 Coston2 114 Polygon 137 Nexilix Smart Chain 240 Fantom 250 zkSync Era Testnet 280 Boba Network 288 Filecoin Mainnet 314 zkSync Era 324 Cronos Testnet 338 PulseChain 369 Optimism Goerli 420 Metis Goerli 599 Taraxa Mainnet 841 Taraxa Testnet 842 Wanchain 888 PulseChain V4 943 5ireChain Thunder Testnet 997 Zora Goerli Testnet 999 Bronos Testnet 1038 Bronos 1039 Metis 1088 Polygon zkEVM 1101 Moonbeam 1284 Moonriver 1285 Moonbase Alpha 1287 Localhost 1337 Polygon zkEVM Testnet 1442 Dogechain 2000 Edgeware EdgeEVM Mainnet 2021 Beresheet BereEVM Testnet 2022 Filecoin Hyperspace 3141 Crossbell 3737 Fantom Testnet 4002 Nexi 4242 IoTeX 4689 IoTeX Testnet 4690 MEVerse Chain Testnet 4759 BlackFort Exchange Network Testnet 4777 BlackFort Exchange Network 4999 Mantle 5000 Mantle Testnet 5001 MEVerse Chain Mainnet 7518 Canto 7700 Shardeum Sphinx 8082 Klaytn 8217 Base 8453 Evmos Testnet 9000 Evmos 9001 Gnosis Chiado 10200 HAQQ Mainnet 11235 Fibo Chain 12306 Cannoli 17323 Hardhat 31337 Arbitrum One 42161 Celo 42220 Avalanche Fuji 43113 Avalanche 43114 Alfajores 44787 DFK Chain 53935 HAQQ Testedge 2 54211 Linea Goerli Testnet 59140 Polygon Mumbai 80001 Base Goerli 84531 Taiko (Alpha-3 Testnet) 167005 Filecoin Calibration 314159 Arbitrum Goerli 421613 Scroll Testnet 534353 Zhejiang 1337803 Zora 7777777 Sepolia 11155111 SKALE - Razor Network 278611351 SKALE - Calypso NFT Hub Testnet 344106930 SKALE - Block Brawlers 391845894 SKALE - Europa Liquidity Hub Testnet 476158412 SKALE - Nebula Gaming Hub Testnet 503129905 SKALE - CryptoBlades 1026062157 SKALE - Human Protocol 1273227453 Aurora 1313161554 Aurora Testnet 1313161555 SKALE - Titan Community Hub 1350216234 SKALE - Chaos Testnet 1351057110 SKALE - Nebula Gaming Hub 1482601649 SKALE - Titan Community Hub Testnet 1517929550 SKALE - Calypso NFT Hub 1564830818 Harmony One 1666600000 SKALE - Europa Liquidity Hub 2046399126 SKALE - Exorde 2139927552 -
A Crypto Wallet is installed and the address and private key of an account. That will be used to deploy the smart contract. That account will be the Owner. Please make sure you have a couple of ether to pay the gas fee upon contract deployment. You must remove the private key after you successfully deployed the contract to a network. That will not be disclosed to the front end. Only the owner's public address will be public. So no worry. How to export the private key from MetaMask
-
A Tawk.to account and property URL. We prefer using this free but powerful service to enable communication between the buyer/seller and the application owner/admin.
Steps
After purchasing Crypto Token Escrow, you will get a compressed zip file named erc20-escrow-v2.0.0.zip or something similar. Just extract that file at a suitable location on your local computer. You will get 3 more zip file in extracted folder. One is for Documents, one zip containing smart contracts application, and the other one is for web3 app. You have to work on smart contracts application. Extract the smart-contracts.zip and web3-app.zip file.
Smart Contract Deployment (smart-contracts folder)
-
Open up a terminal/cmd/PowerShell and navigate to the smart-contracts directory. Where you should get a .env.setup file. Please make sure that your file explorer application shows you the hidden/dotfiles.
-
After navigating to that directory run below commands...
pnpm installcp .env.setup .env -
Open up the .env file into one of your text editors and change a couple of things as below.
-
Replace
__APP_CHAIN_ID__with the chain id you choose from the above chaininfo table. Ex: 11155111 -
Replace
__ERC20_BEP20_TRC20_TOKEN_ADDRESS__with the token address you want your application should interact to (erc20, bep20, trc20) Ex: 0x337610d27c682E347C9cD60BD4b3b107C9d34dDd -
Replace
__MINIMUM_ESCROW_AMOUNT_IN_ETHER__with the minimum escrow amount allowed to create an escrow. In Ether. Ex: 0.001 -
Replace
__ESCROW_FEE_IN_PERCENT__with the escrow fee the owner/you want to be paid upon escrow clearance. In %. Ex: 5 -
Replace
__ALCHEMY_KEY_HERE__with the Alchemy API key. Ex: sdfasdfasdfsdfsdgffhgfghdgf -
Replace
__DEPLOYER_PRIVATE_KEY_HERE__with the owner account private key.
-
-
If you followed all the above points carefully then you are now ready to build and deploy the contract. Run the below commands one by one carefully. Please make sure you have some ether into your deployer/owner address/account to pay the gas fee.
pnpm build-contractpnpm deploy-contractWait some minutes after the above commands. Time depends on the network and other things. So, no worries. The deployment will be a success if you have enough ether to pay the gas fee. If you get a response from the deploy command like below then the deployment is successful. In case you face any issues, please feel free to contact us.
EscrowHub deployed to: 0x421F67801BDa8a0eA4B2BC9D564b5C62Ca599734
We3 App Deployment (web3-app folder)
-
Open up a terminal/cmd/PowerShell and navigate to the web3-app directory. Where you should get a .env.setup file. Please make sure that your file explorer application shows you the hidden/dotfiles.
-
After navigating to that directory run below command...
cp .env.setup .env -
Open up the .env file into one of your text editors and change a couple of things as below.
- Replace
__APP_NAME__with your app title. Ex: Crypto Token Escrow. - Replace
__APP_LIVE_BASEURL__with the app live base url. You can skip this in your local machine. But in live server, it is required. - Replace
__AUTH_SECRET__with a randomly generated string. You can quickly generate a good secret on the command line via this openssl command. Ex: +oRxySo9vvloyCb4fZO/MqCe465zr7gwxK328b71eYM=openssl rand -base64 32 - Replace
__FILEBASE_KEY_HERE__with the Filebase Access key. Ex: C3LB3BL93D1C0F687A66 - Replace
__FILEBASE_SECRET_HERE__with the Filebase Access secret. Ex: VM0pRmuAKe41urmfZWTV9MiKyUgN5WgJn1npn5NK - Replace
__FILEBASE_BUCKET_HERE__with the Filebase bucket name you created before. Ex: cescrow-v2 - Replace
__WALLETCONNECT_PROJECT_ID__with the WalletConnect Cloud project id. - Replace
__TOKEN_SYMBOL_HERE__with the ERC20/BEP20/TRC20 token symbol. You can get the symbol from that token etherscan. EX: USDT - Replace
__TOKEN_DECIMALS_HERE__with the ERC20/BEP20/TRC20 token decimals points. EX: 18 - Replace
__DEPLOYER_ADDRESS_HERE__with the owner's account address. Ex: 0xFe5e946EcccB0f59542D5B99740fa432423F2F63 - Replace
__TAWK_TO_URL__with Tawk.to property chat box URL. Check the example in the .env file.
- Replace
-
Copy the whole content of smart-contracts/.env file and paste at the end of web3-app/.env file.
-
Remove
DEPLOYERvariable and its value from web3-app/.env file
Production Deployment
We recommend Vercel as a serverless no hassle deployment server. They have really great support for NextJS-based application deployment.
Vercel Deployment
You must need git installed into your local machine to deploy using this method. Please check this Youtube Video at least 3 times if you are not an expert. Then try to deploy to Vercel.
On Environment Variables section of Vercel build settings, copy the whole local .env file content using CMD/CTRL+A and paste into the variable input. Remove DEPLOYER variable.
VPS, DO Droplet deployment
This way of deployment is not so much easy. We recommend hiring an expert and spending some penny if you are not an expert. However, we are providing the guide. Please check this Youtube Video to learn this way.
Please ensure you upload the local .env file to the server also.
For more references, please check out this tutorial.
Upgrading V1 To V2
To upgrade the Crypto Token Escrow V1 to V2 is very simple. You don't have to do anything about contract deployment. Just follow those steps.
-
Start following this doc from Production Deployment
-
Collect below environment variables with it's value from previous V1 deployment in Vercel/VPS/Cloud.
NEXT_PUBLIC_CHAINNEXT_PUBLIC_MINIMUM_ESCROWNEXT_PUBLIC_ESCROW_FEENEXT_PUBLIC_TOKEN_ADDRESSNEXT_PUBLIC_CONTRACT_ADDRESS -
Get a Alchemy key and set
NEXT_PUBLIC_ALCHEMY_API_KEY -
Set below variables from the token info...
NEXT_PUBLIC_TOKEN_SYMBOL= NEXT_PUBLIC_TOKEN_DECIMALS= -
Merge above environment variables with rest of others described in Here
-
You are ready to deploy.
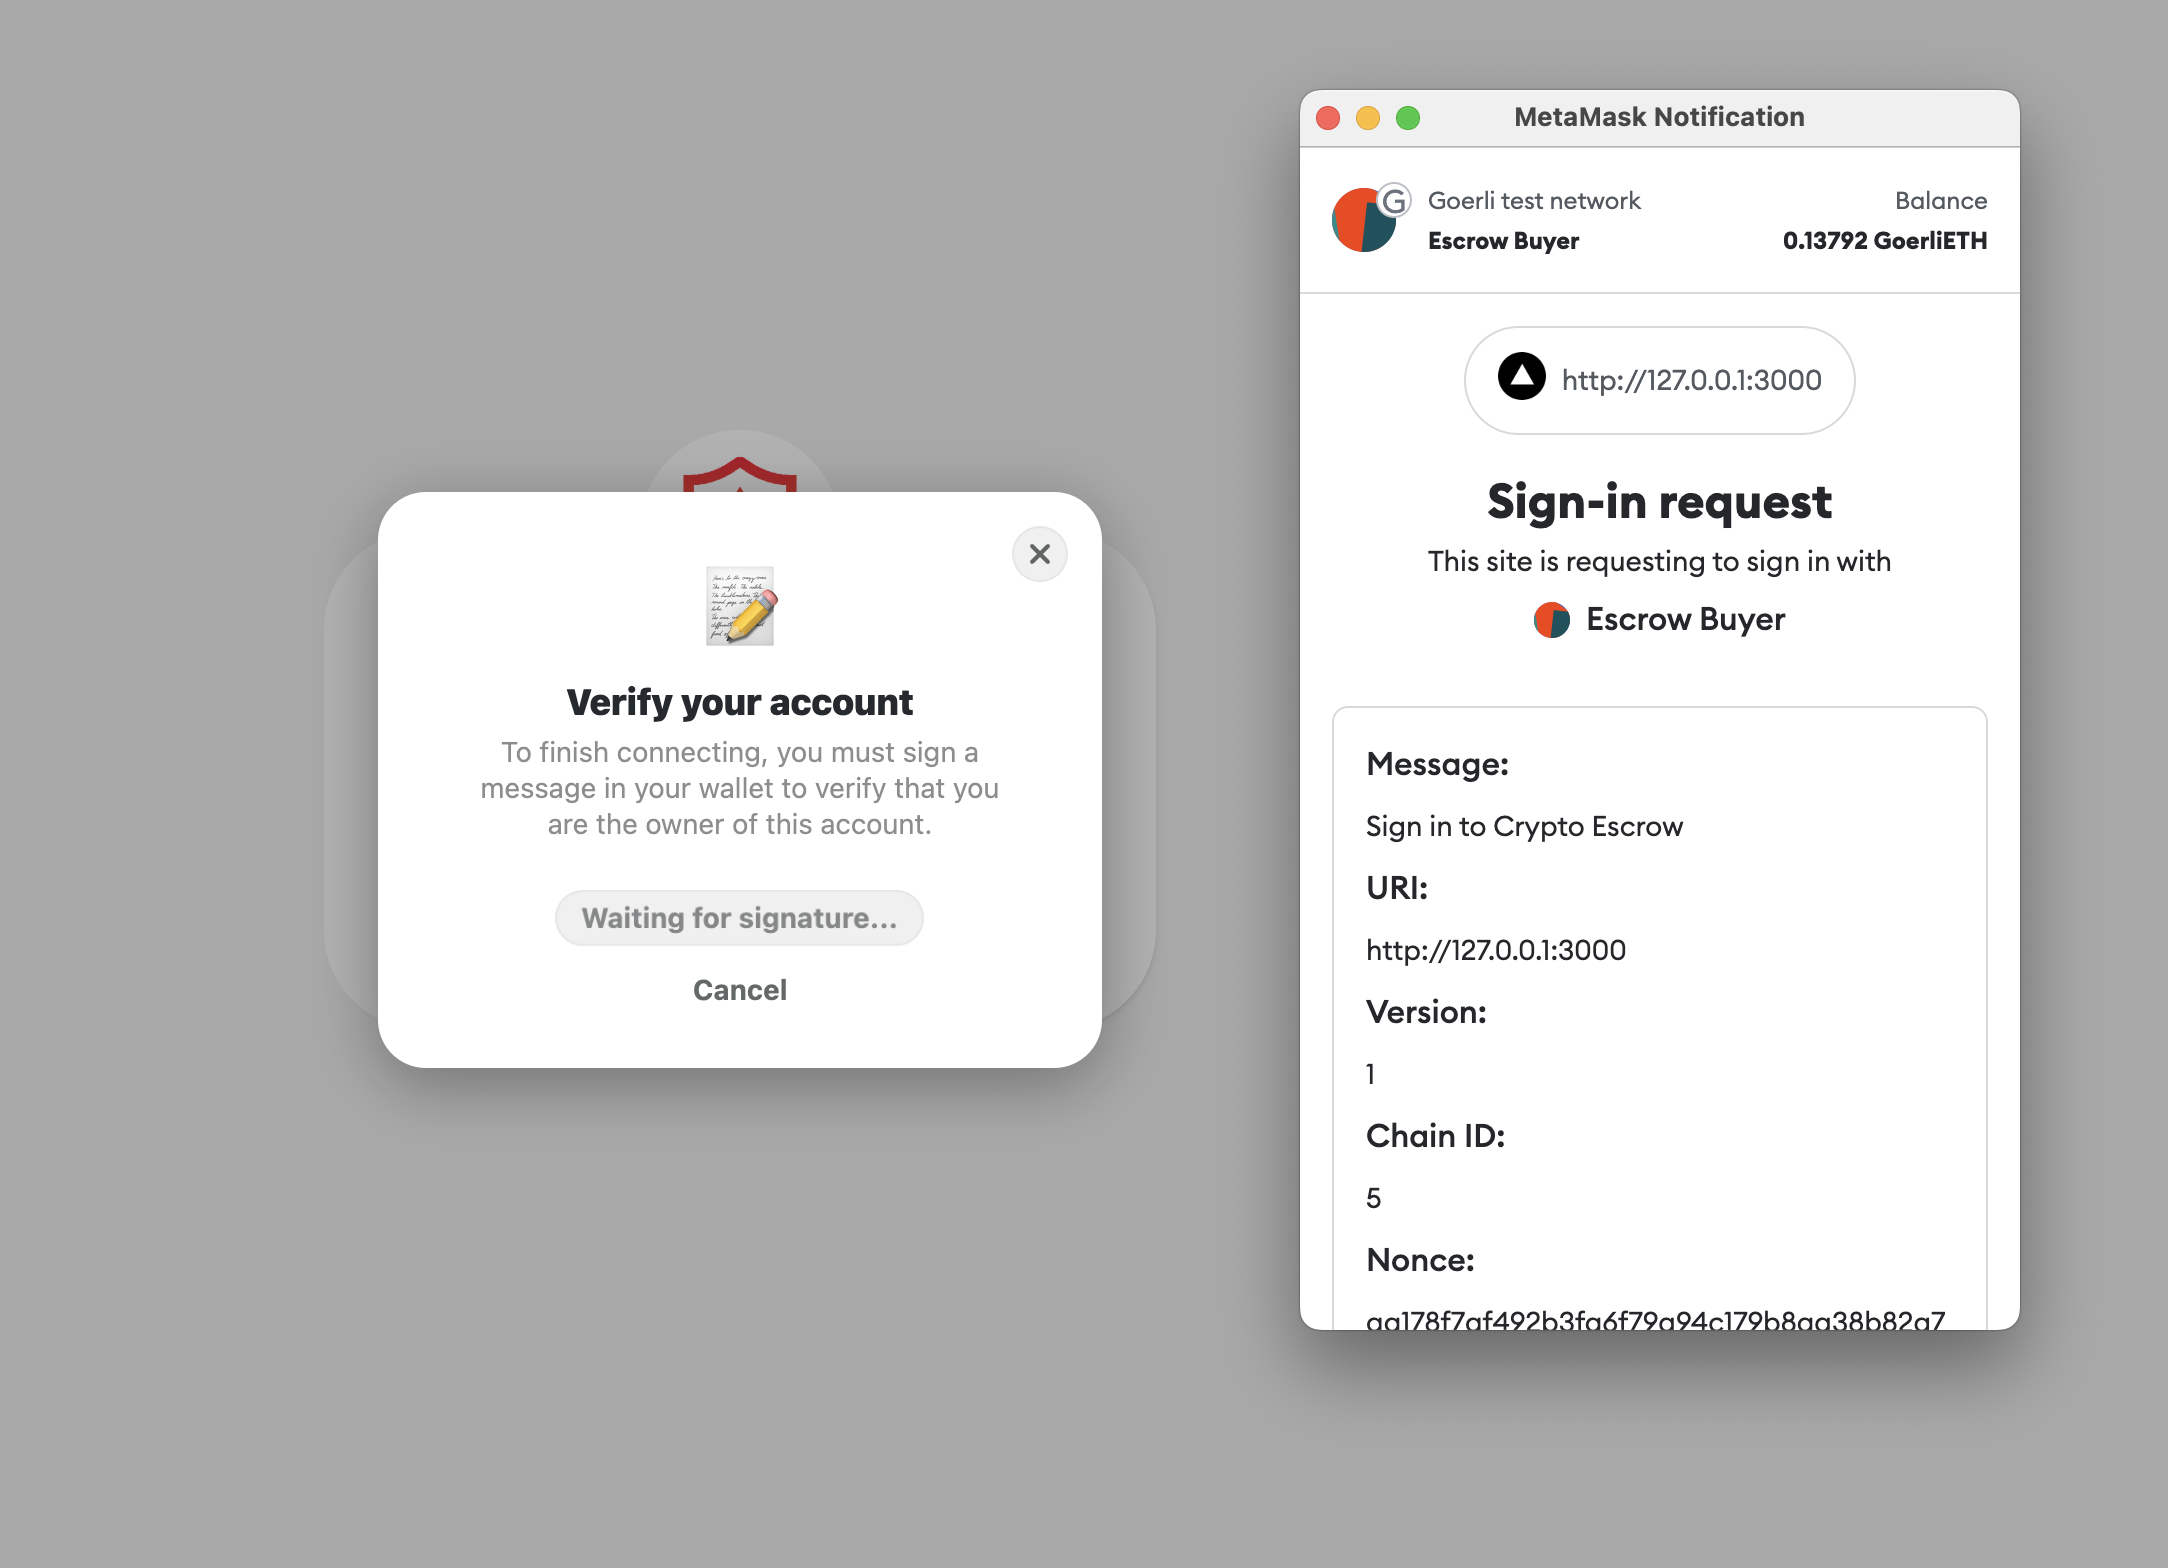
Sign In
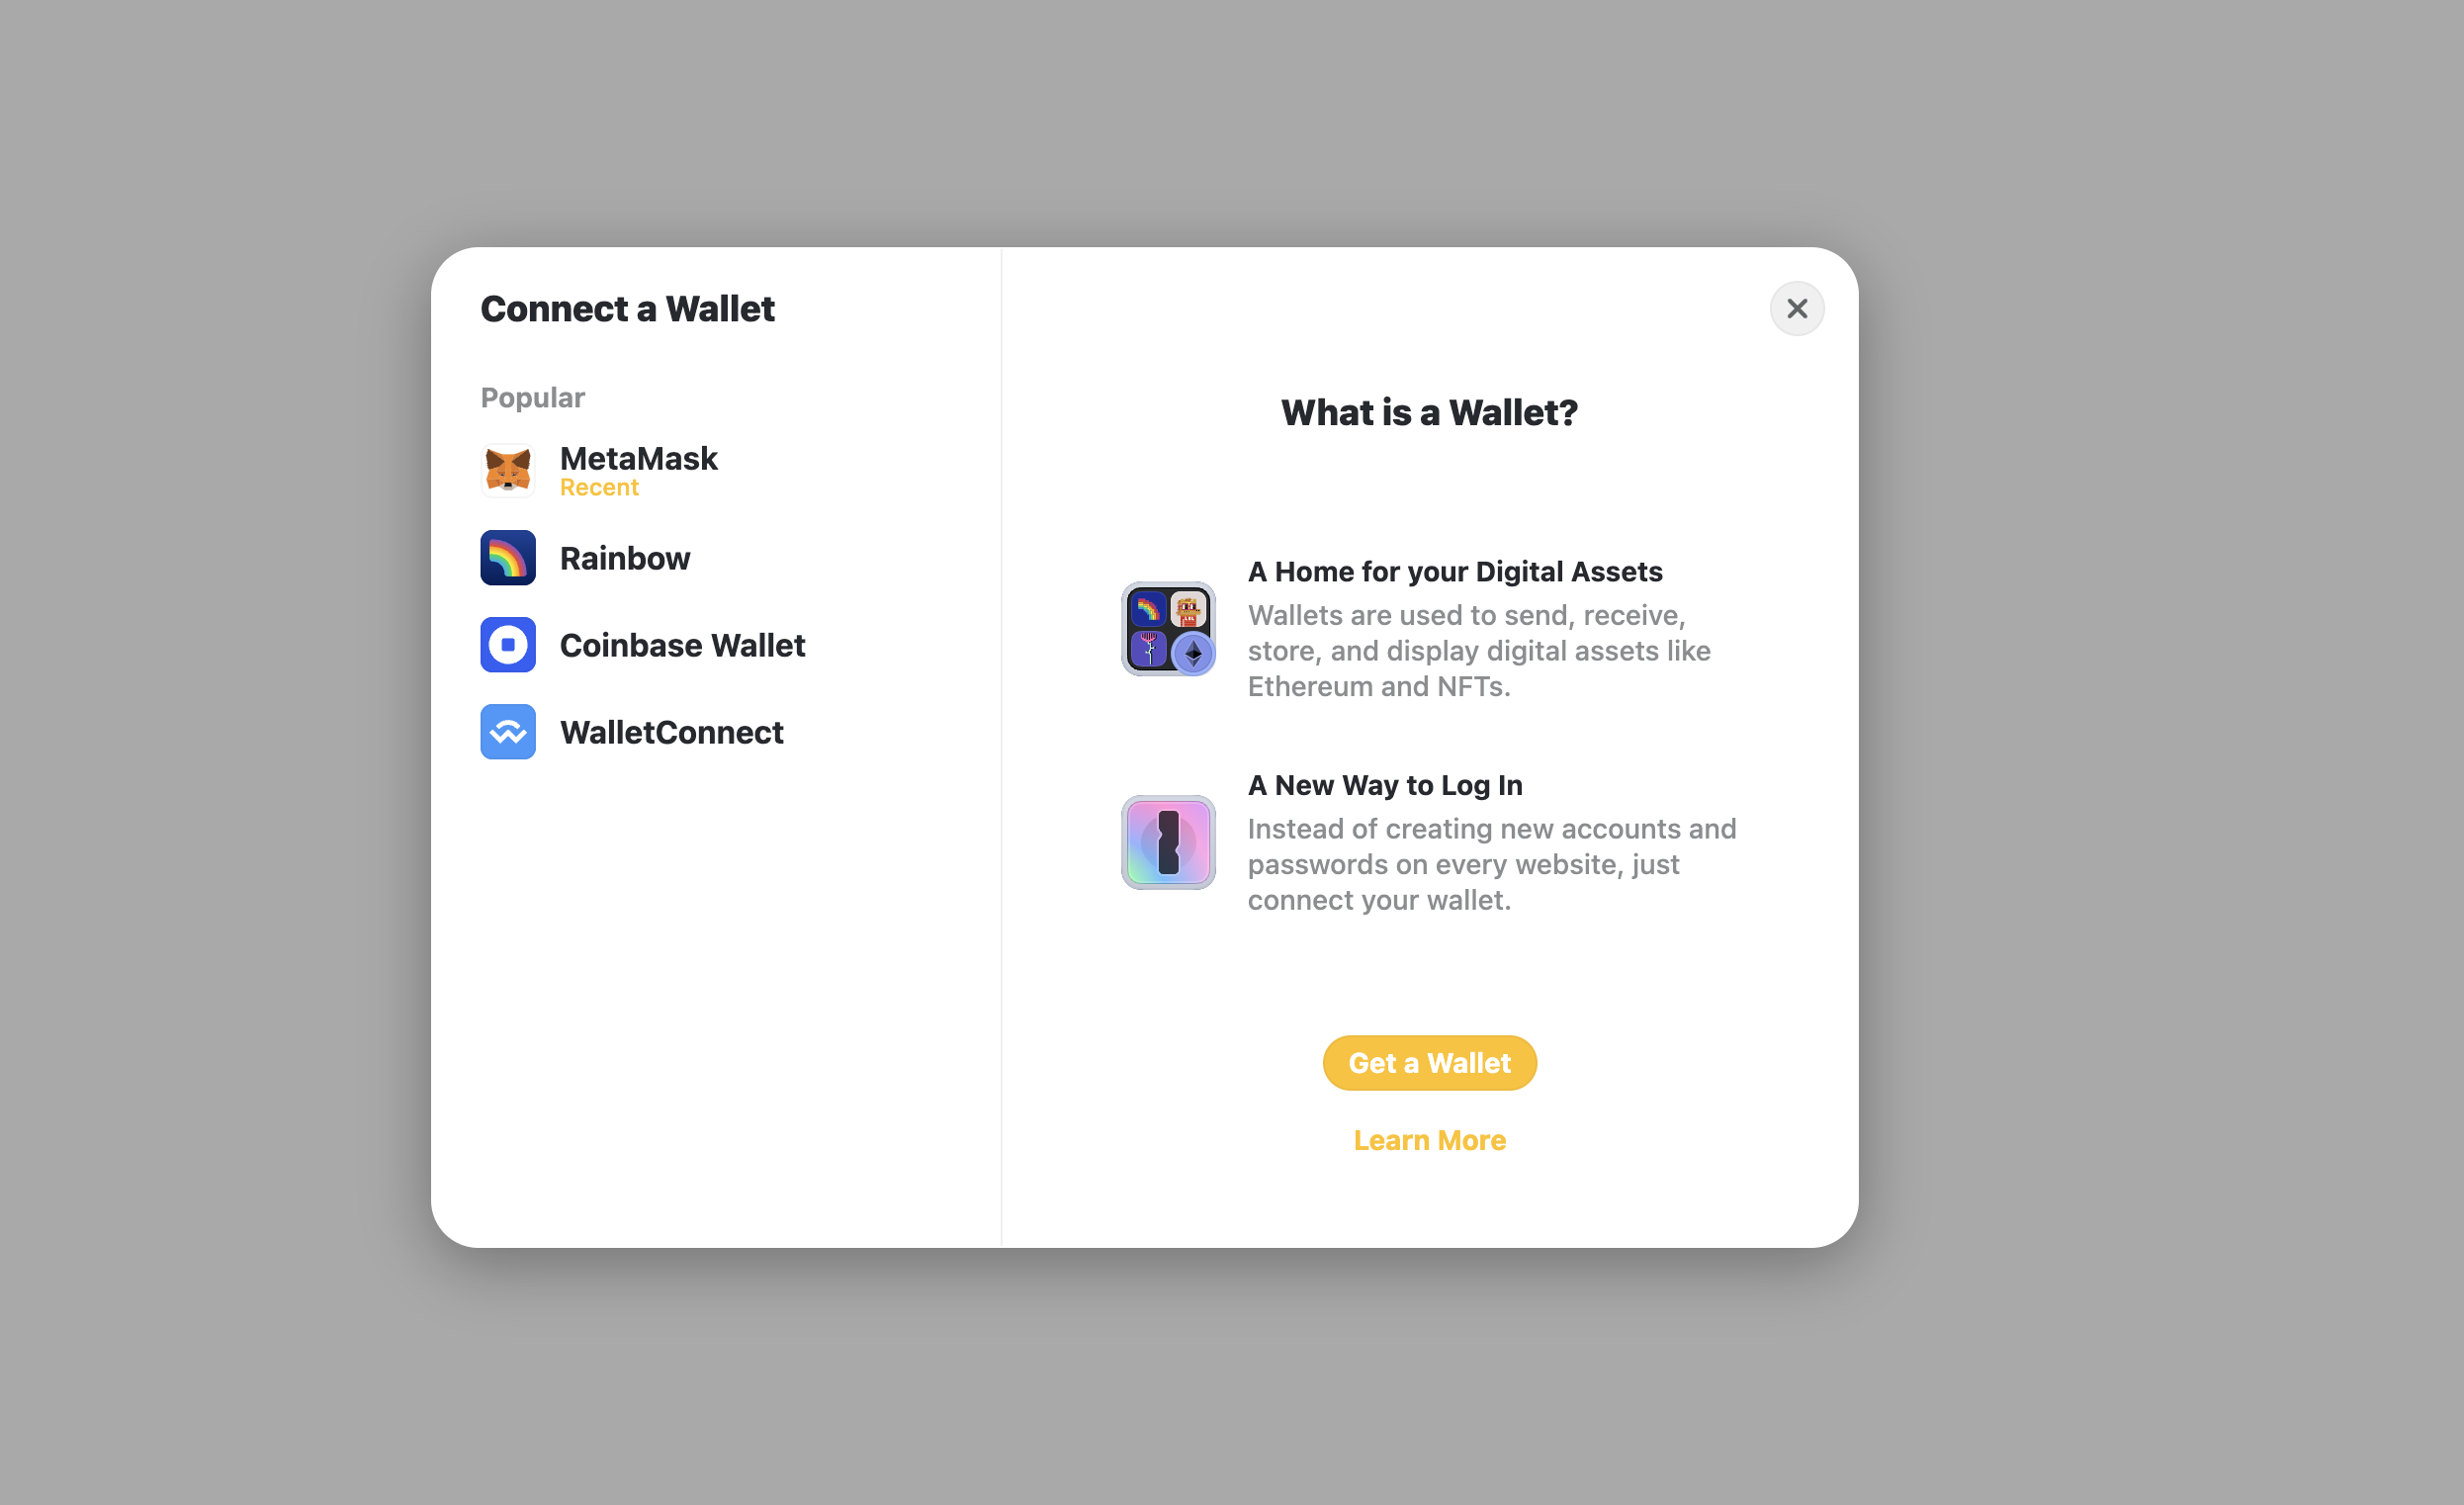
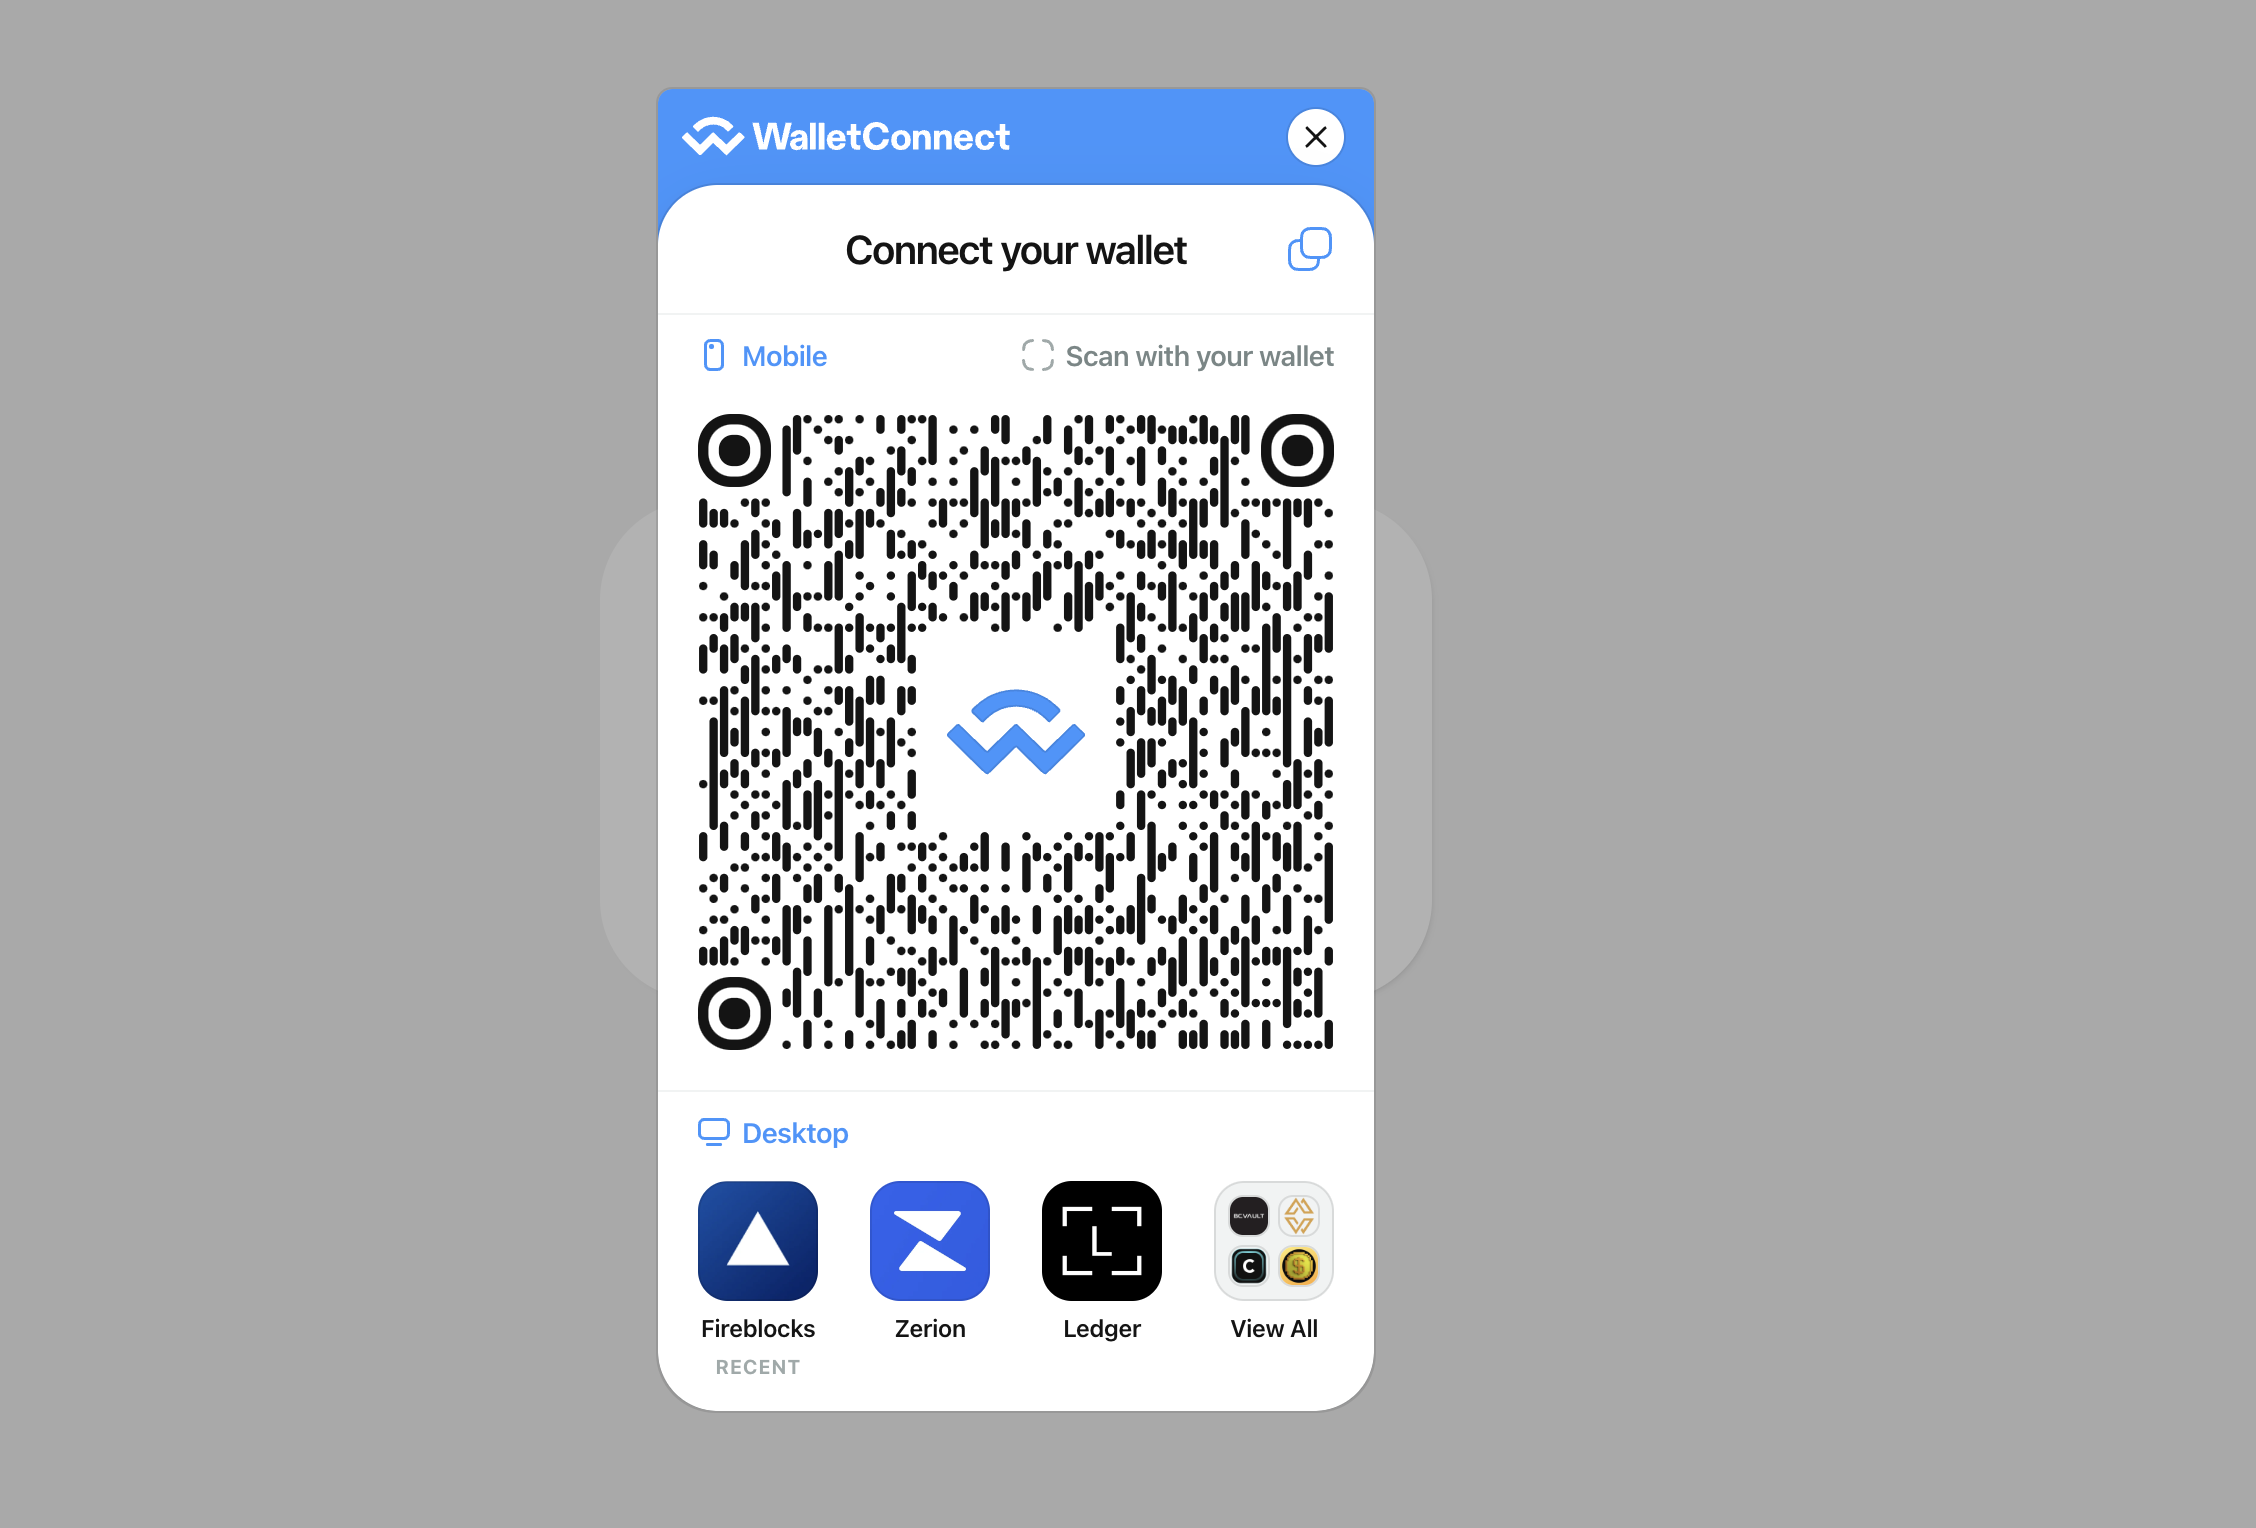
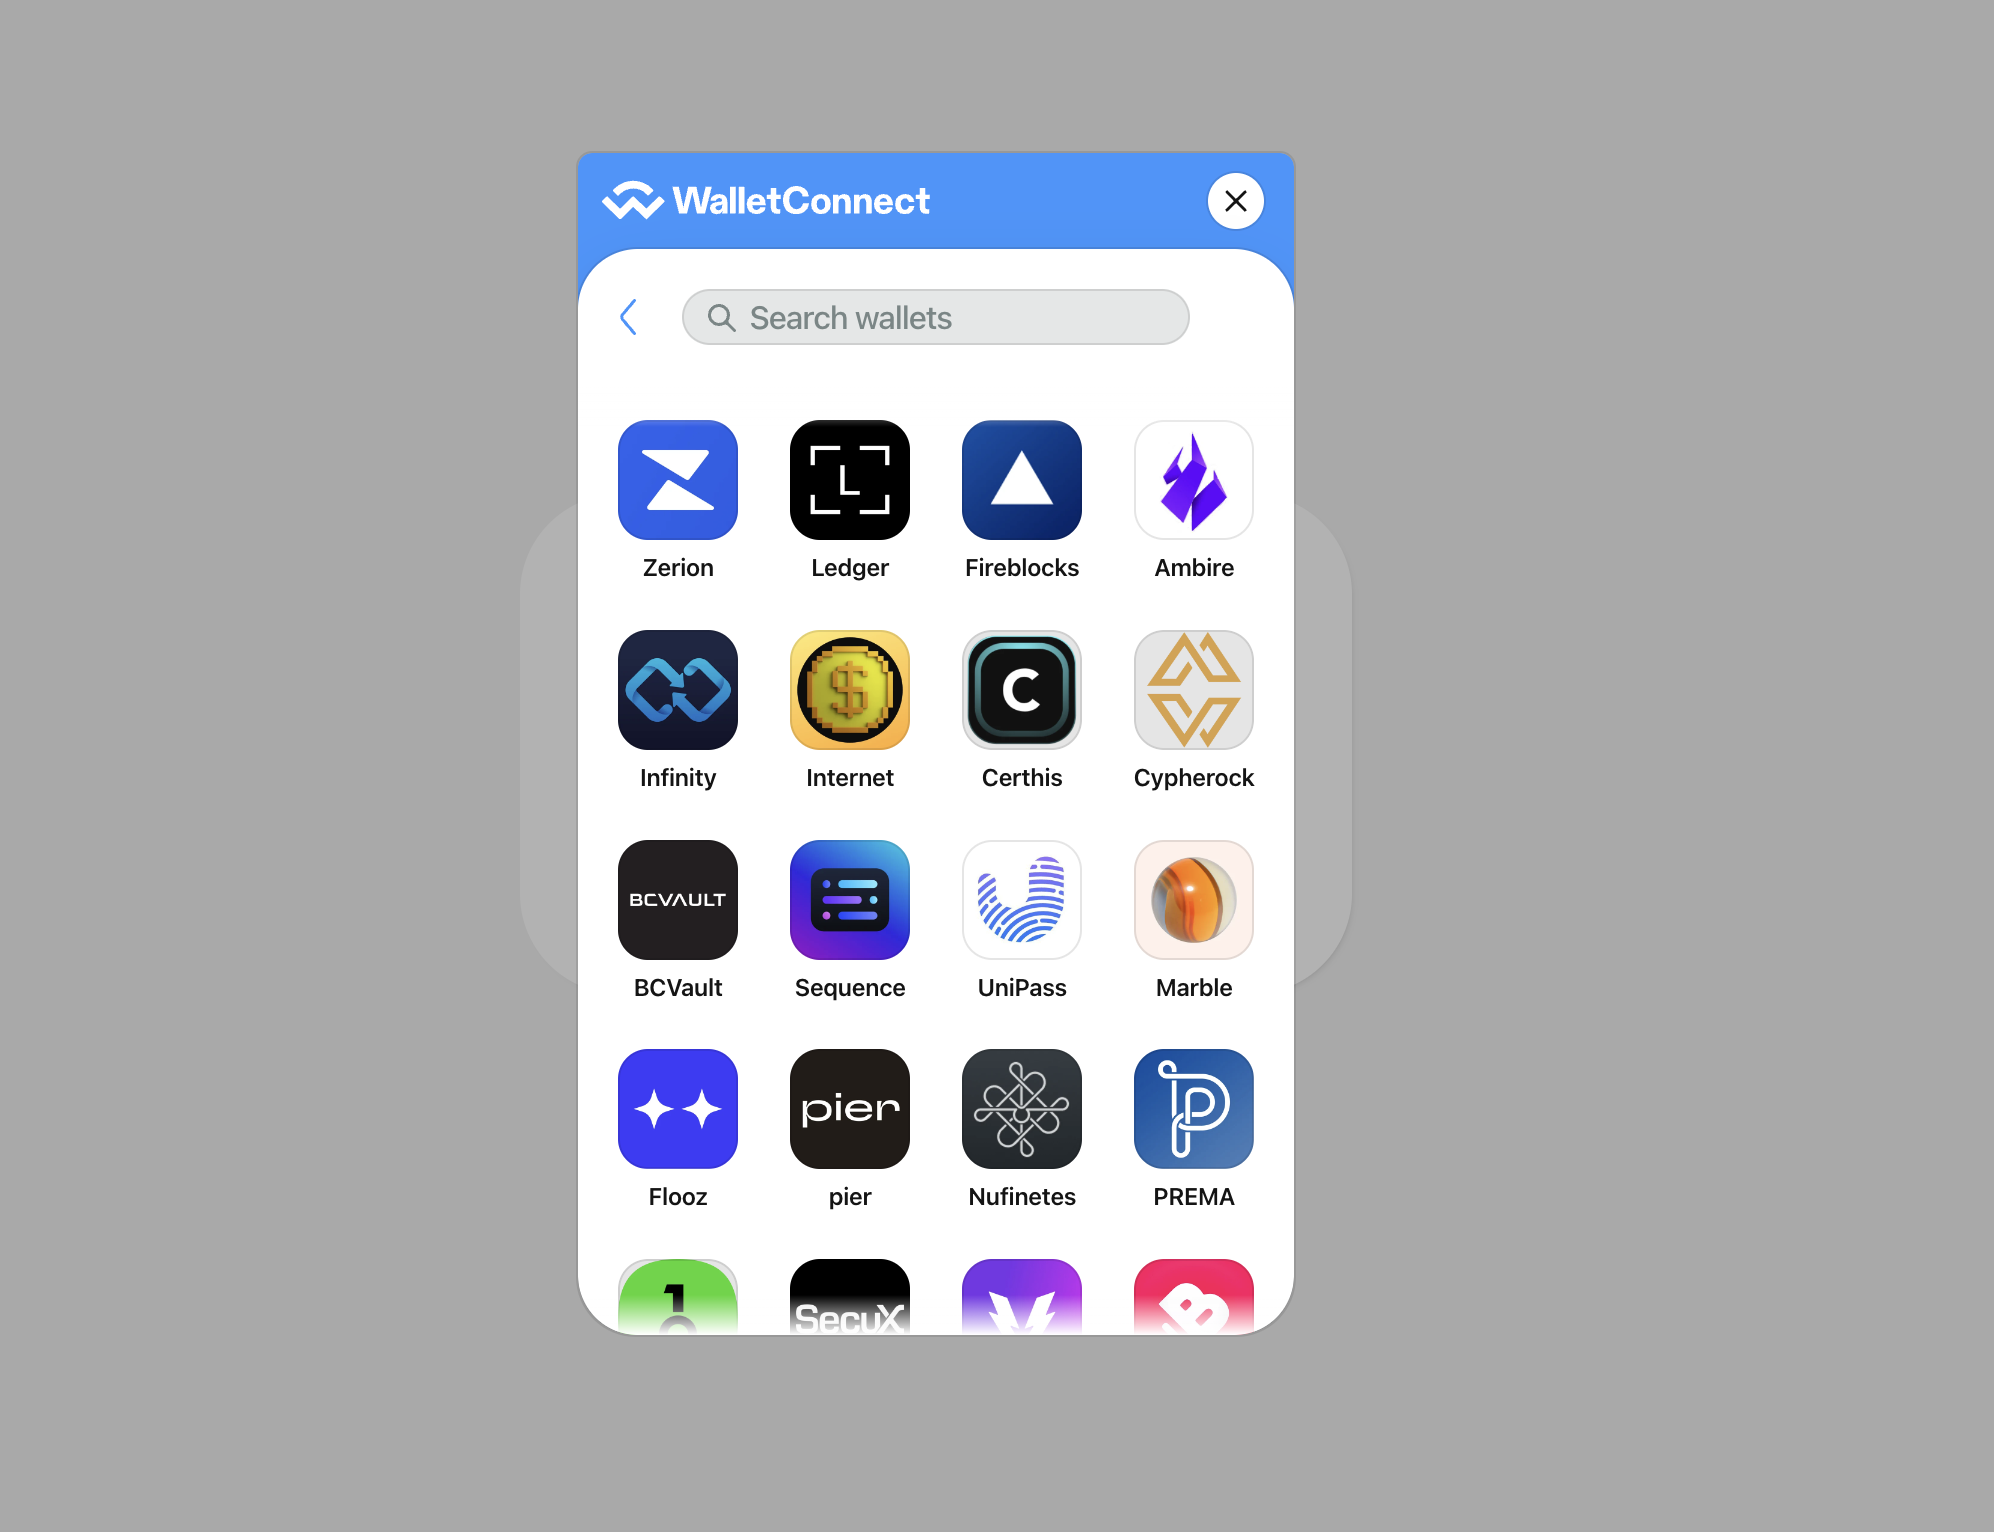
To sign into the Crypto Token Escrow app, you must add a wallet to the application. Currently, Crypto Token Escrow support dedicated MetaMask, Coinbase and 300+ more wallet through WalletConnect. Rainbow and Safe multisig wallets are also there. You can also connect via a QR code.
If you do not know how to install and use those wallets then please consider searching on Google** and YouTube. That is not our cup of tea. We are assuming that you already know one of those wallets.
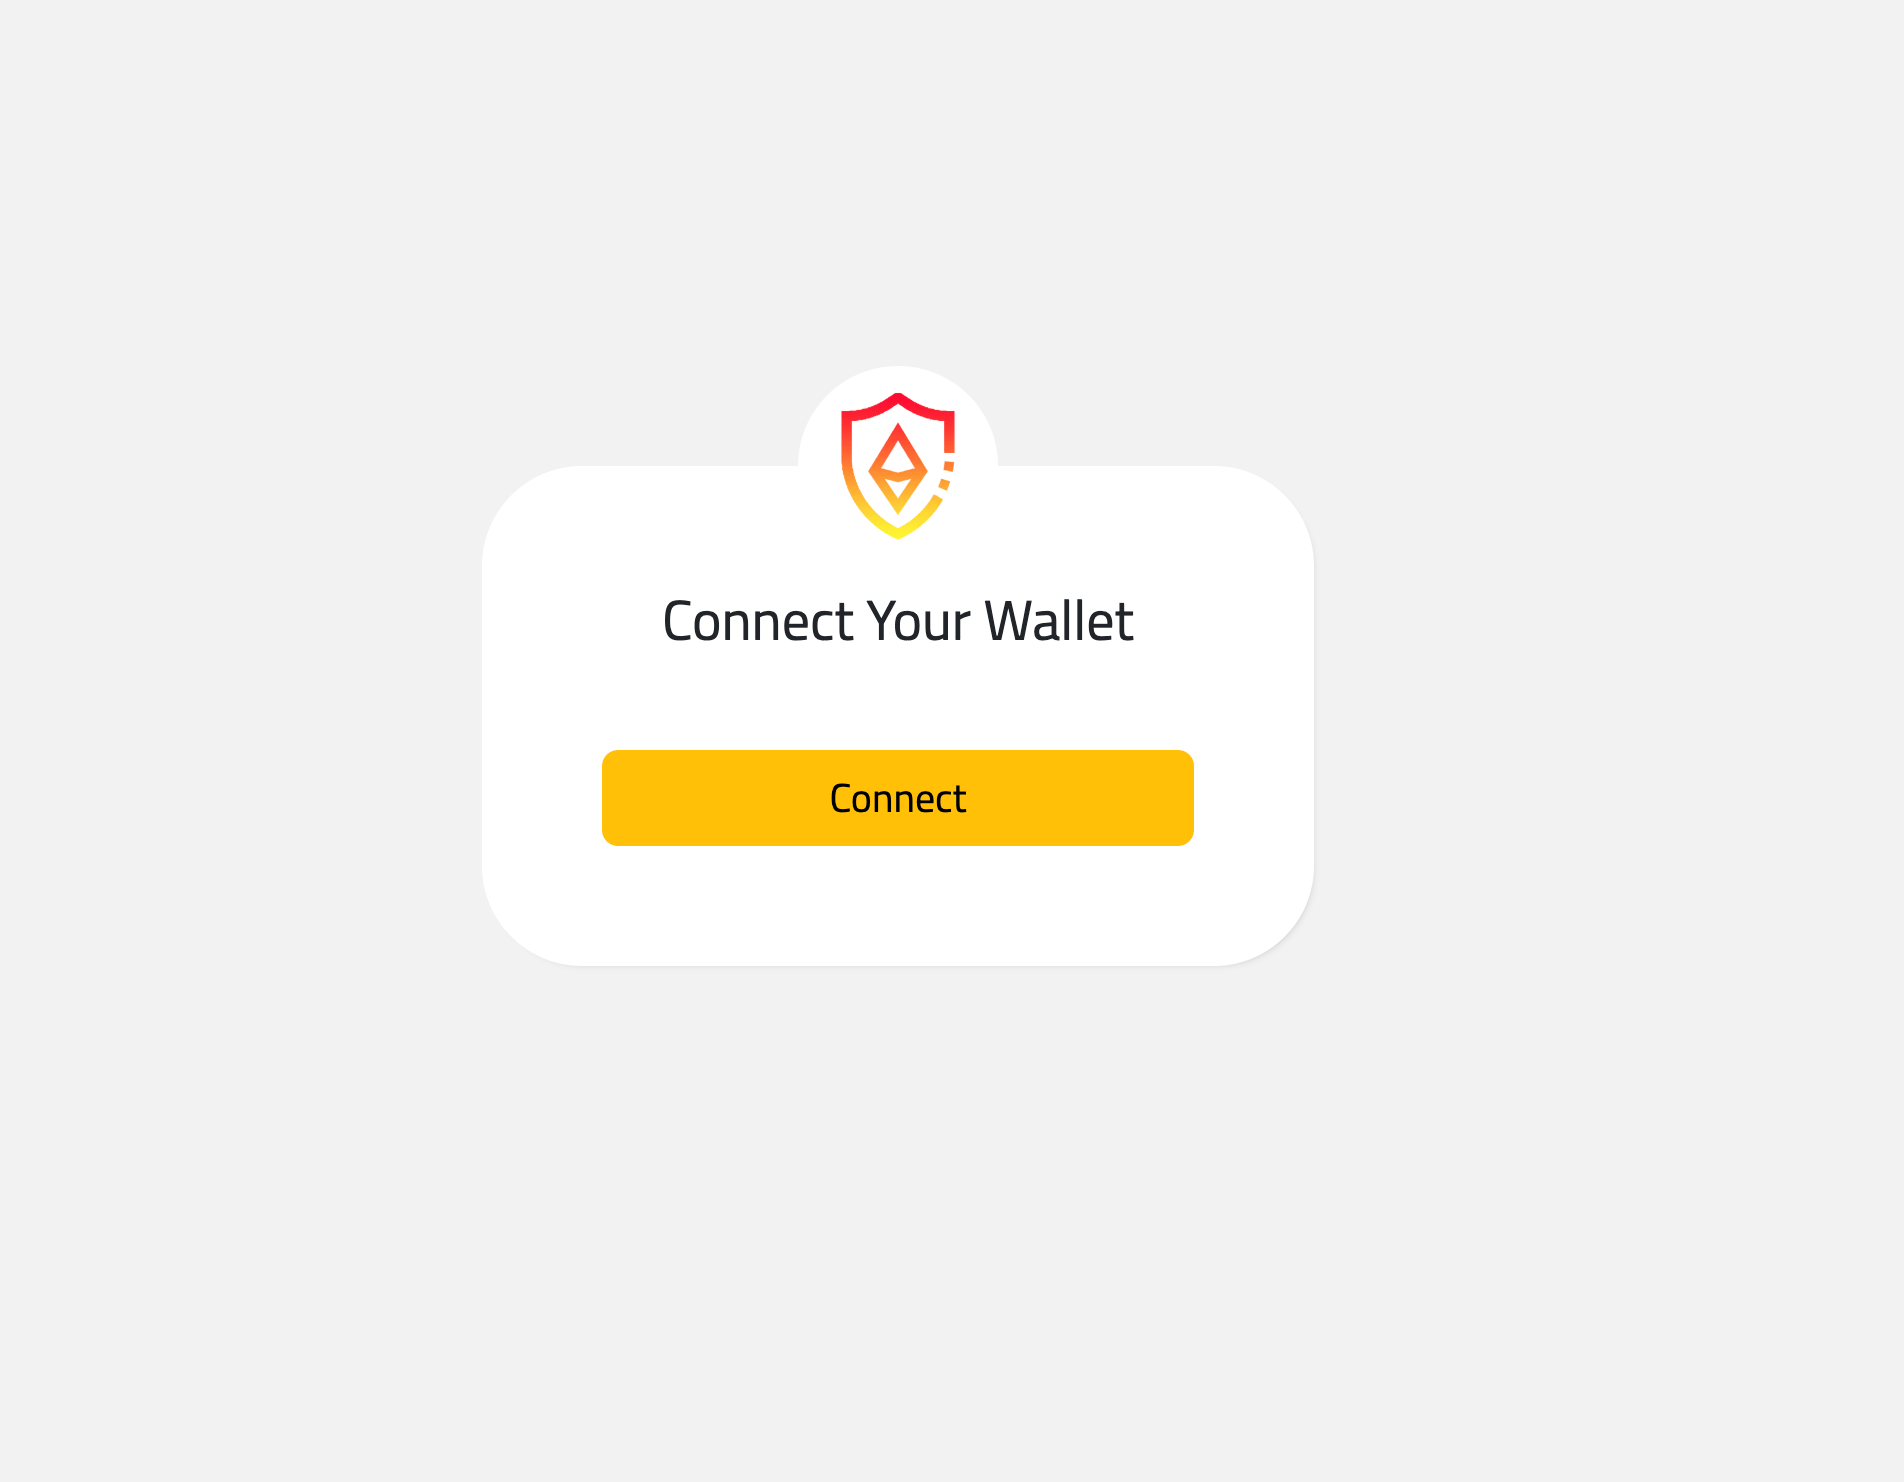
Visit your domain/URL. At a very first glance, you should see a page like the one below asking to connect a wallet.
 After clicking on connect button...
 Some other wallets are hidden. Will be visible on some situation where you don't have metamask or coinbase. Or you embed the app in Safe app browser. Or you have TrustWallet installed.
We used MetaMake to capture those images.
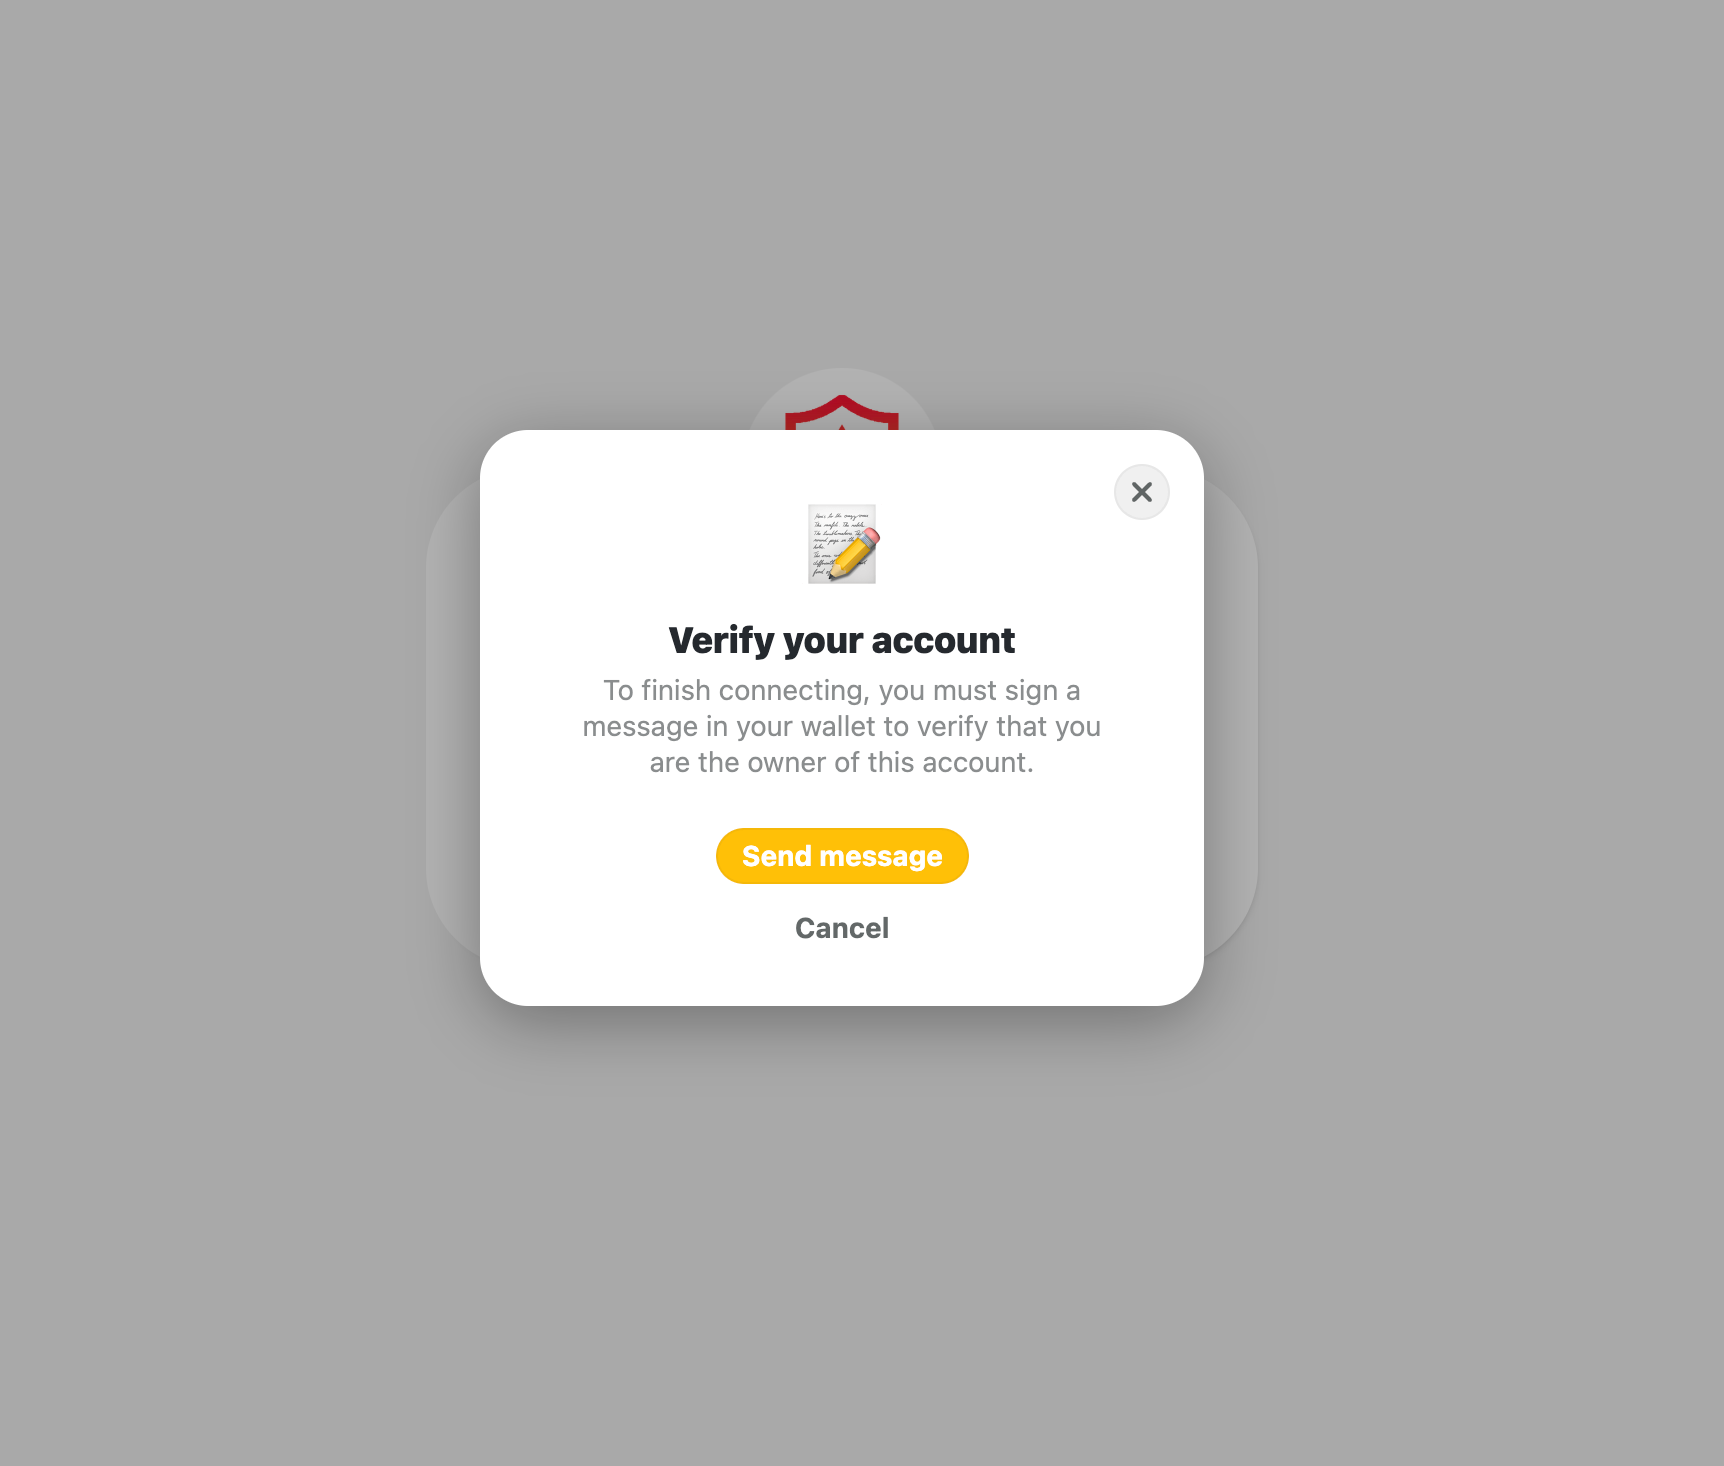
After connecting successfully you will be asked to sign into the Crypto Token Escrow app. Click on the Sign In button.
Escrow Management
Crypto Token Escrow is a React/Nextjs-based single-page application with no backend. It performs all its actions from the front end. But it is secure also. It uses IPFS/Filecoin decentralized object storage through Web3Storage to store metadata and other files. And all the queries and mutations to the smart contract you deployed before.
Let us describe the escrow lifecycle and properties.
-
Every Escrow has some properties. An escrow belongs to two different parties, the first party (buyer) and the second party (seller).
- First party (buyer): Who creates/places a new escrow with other details.
- Second party (seller): Seller address that the buyer (first party) provided while creating the escrow.
-
Escrow title and description are metadata for an escrow where the title is required but the description is optional.
-
Ether amount will be provided by the buyer/first party while creating escrow inclusively and will be calculated and divided into two parts. The fee (the owner will receive upon fund clearance) and the actual amount the seller will receive if no refund happens. The entered amount will be transferred to the escrow from the buyer/first party's account while creating escrow.
-
The expiration time determines when the Escrow will be expired. After expiration, if the escrow is still in the initial state then the seller (2nd party) can claim the fund on his/her own.
-
An Escrow can have multiple statuses.
- The initial status is Awaiting Delivery just after the buyer created the escrow. The buyer can deliver funds at any time when the escrow is in Awaiting Delivery state. App owner and escrow seller can refund the buyer at any time in Awaiting Delivery state. All the actions must perform only in this state. Others' status will behave like stalled actually.
- When the buyer delivers the funds, the state will change to COMPLETED. In this state, there are no actions that can perform on Escrow.
- After creating escrow, the owner or the seller (second party) can refund the buyer at any time in Awaiting Delivery** state. After the refund transaction, the escrow state will change to the Refunded state.
- After expiration time, if the escrow is still in Awaiting Delivery state, then the seller can claim the fund on their own. After a successful claim transaction, the escrow state will change to Claim after Expire state.
Whether the buyer (first party) delivers the fund or the seller (2nd party) claims the fund after expiration, the escrow fee will be transferred to the owner/deployer wallet address and the actual amount will be transferred to the seller. But, if the Owner or the seller performs the refund then the whole amount (fee+escrow amount) will be refunded to the buyer's (first party) wallet address.
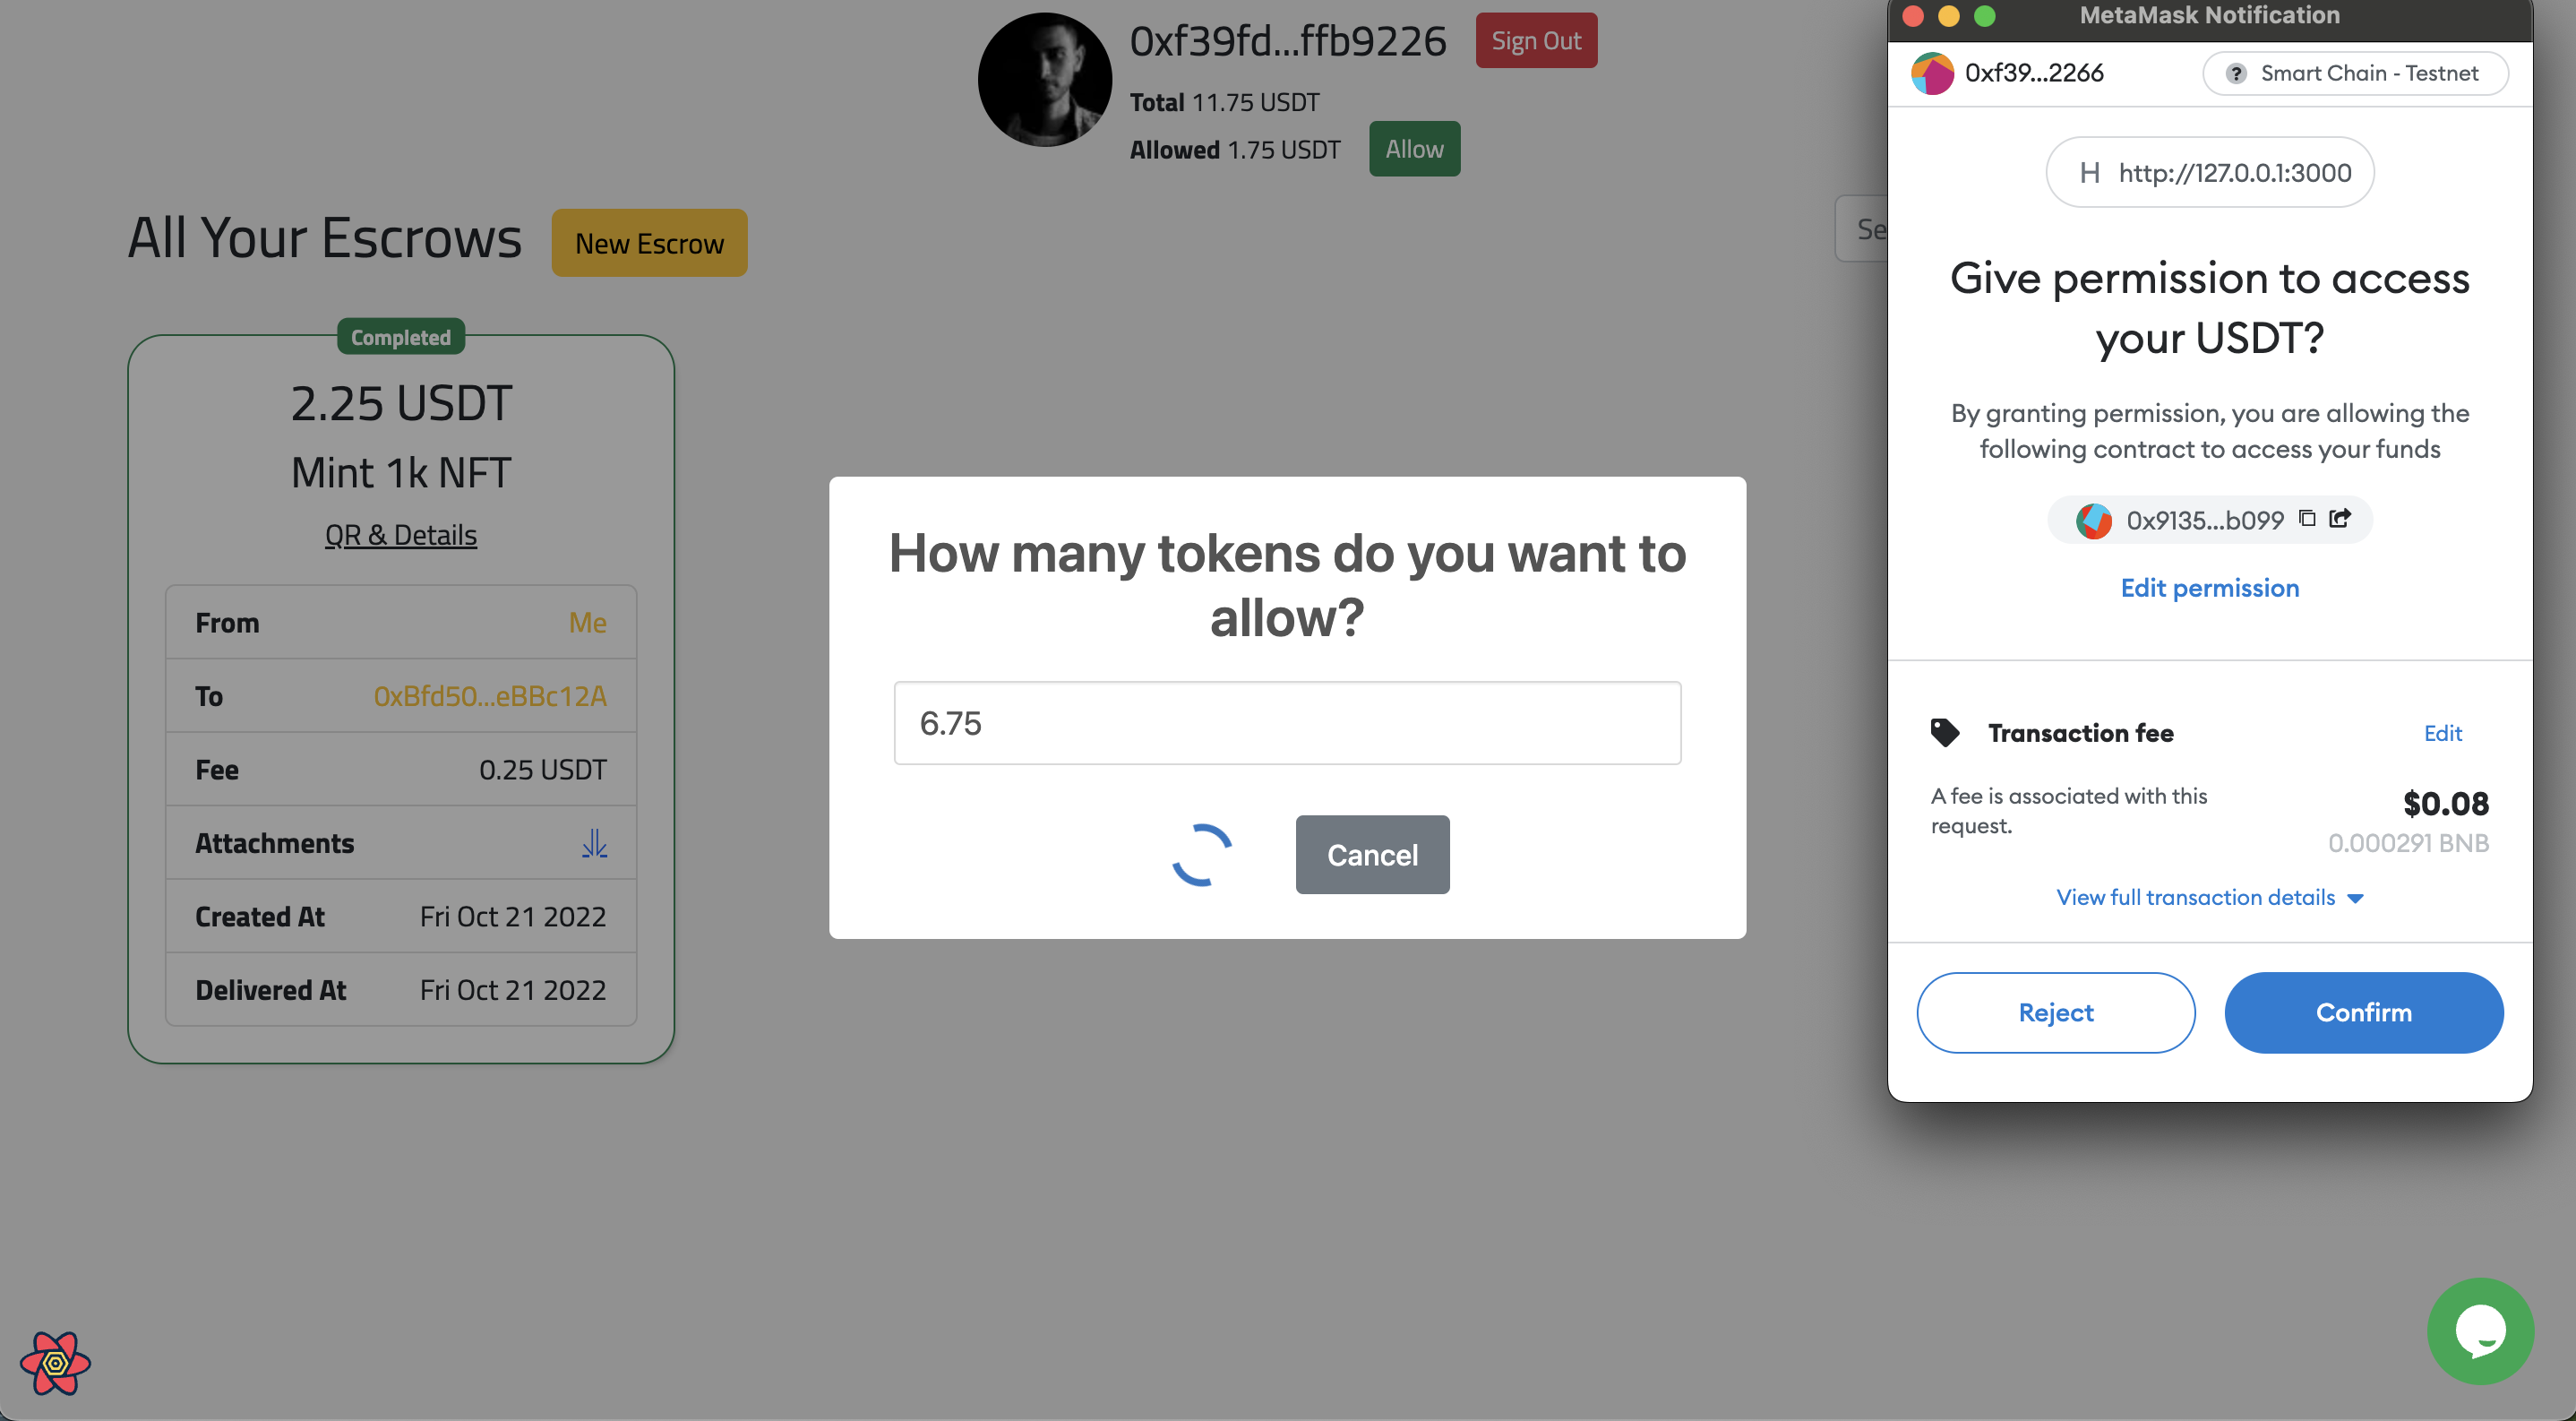
Approve/Allow Tokens
Before creating the escrow, enough amount of tokens must be approved/allowed to spend on behalf of the buyer. The buyer should allow this before creating the escrow. The buyer will need to ensure that, the amount of the allowed token is equal to or larger than the escrow amount. Also, those tokens are available in his wallet.
Create Escrow
Click on the New Escrow button to create a new escrow. A popup with a couple of fields will be shown like the below image.
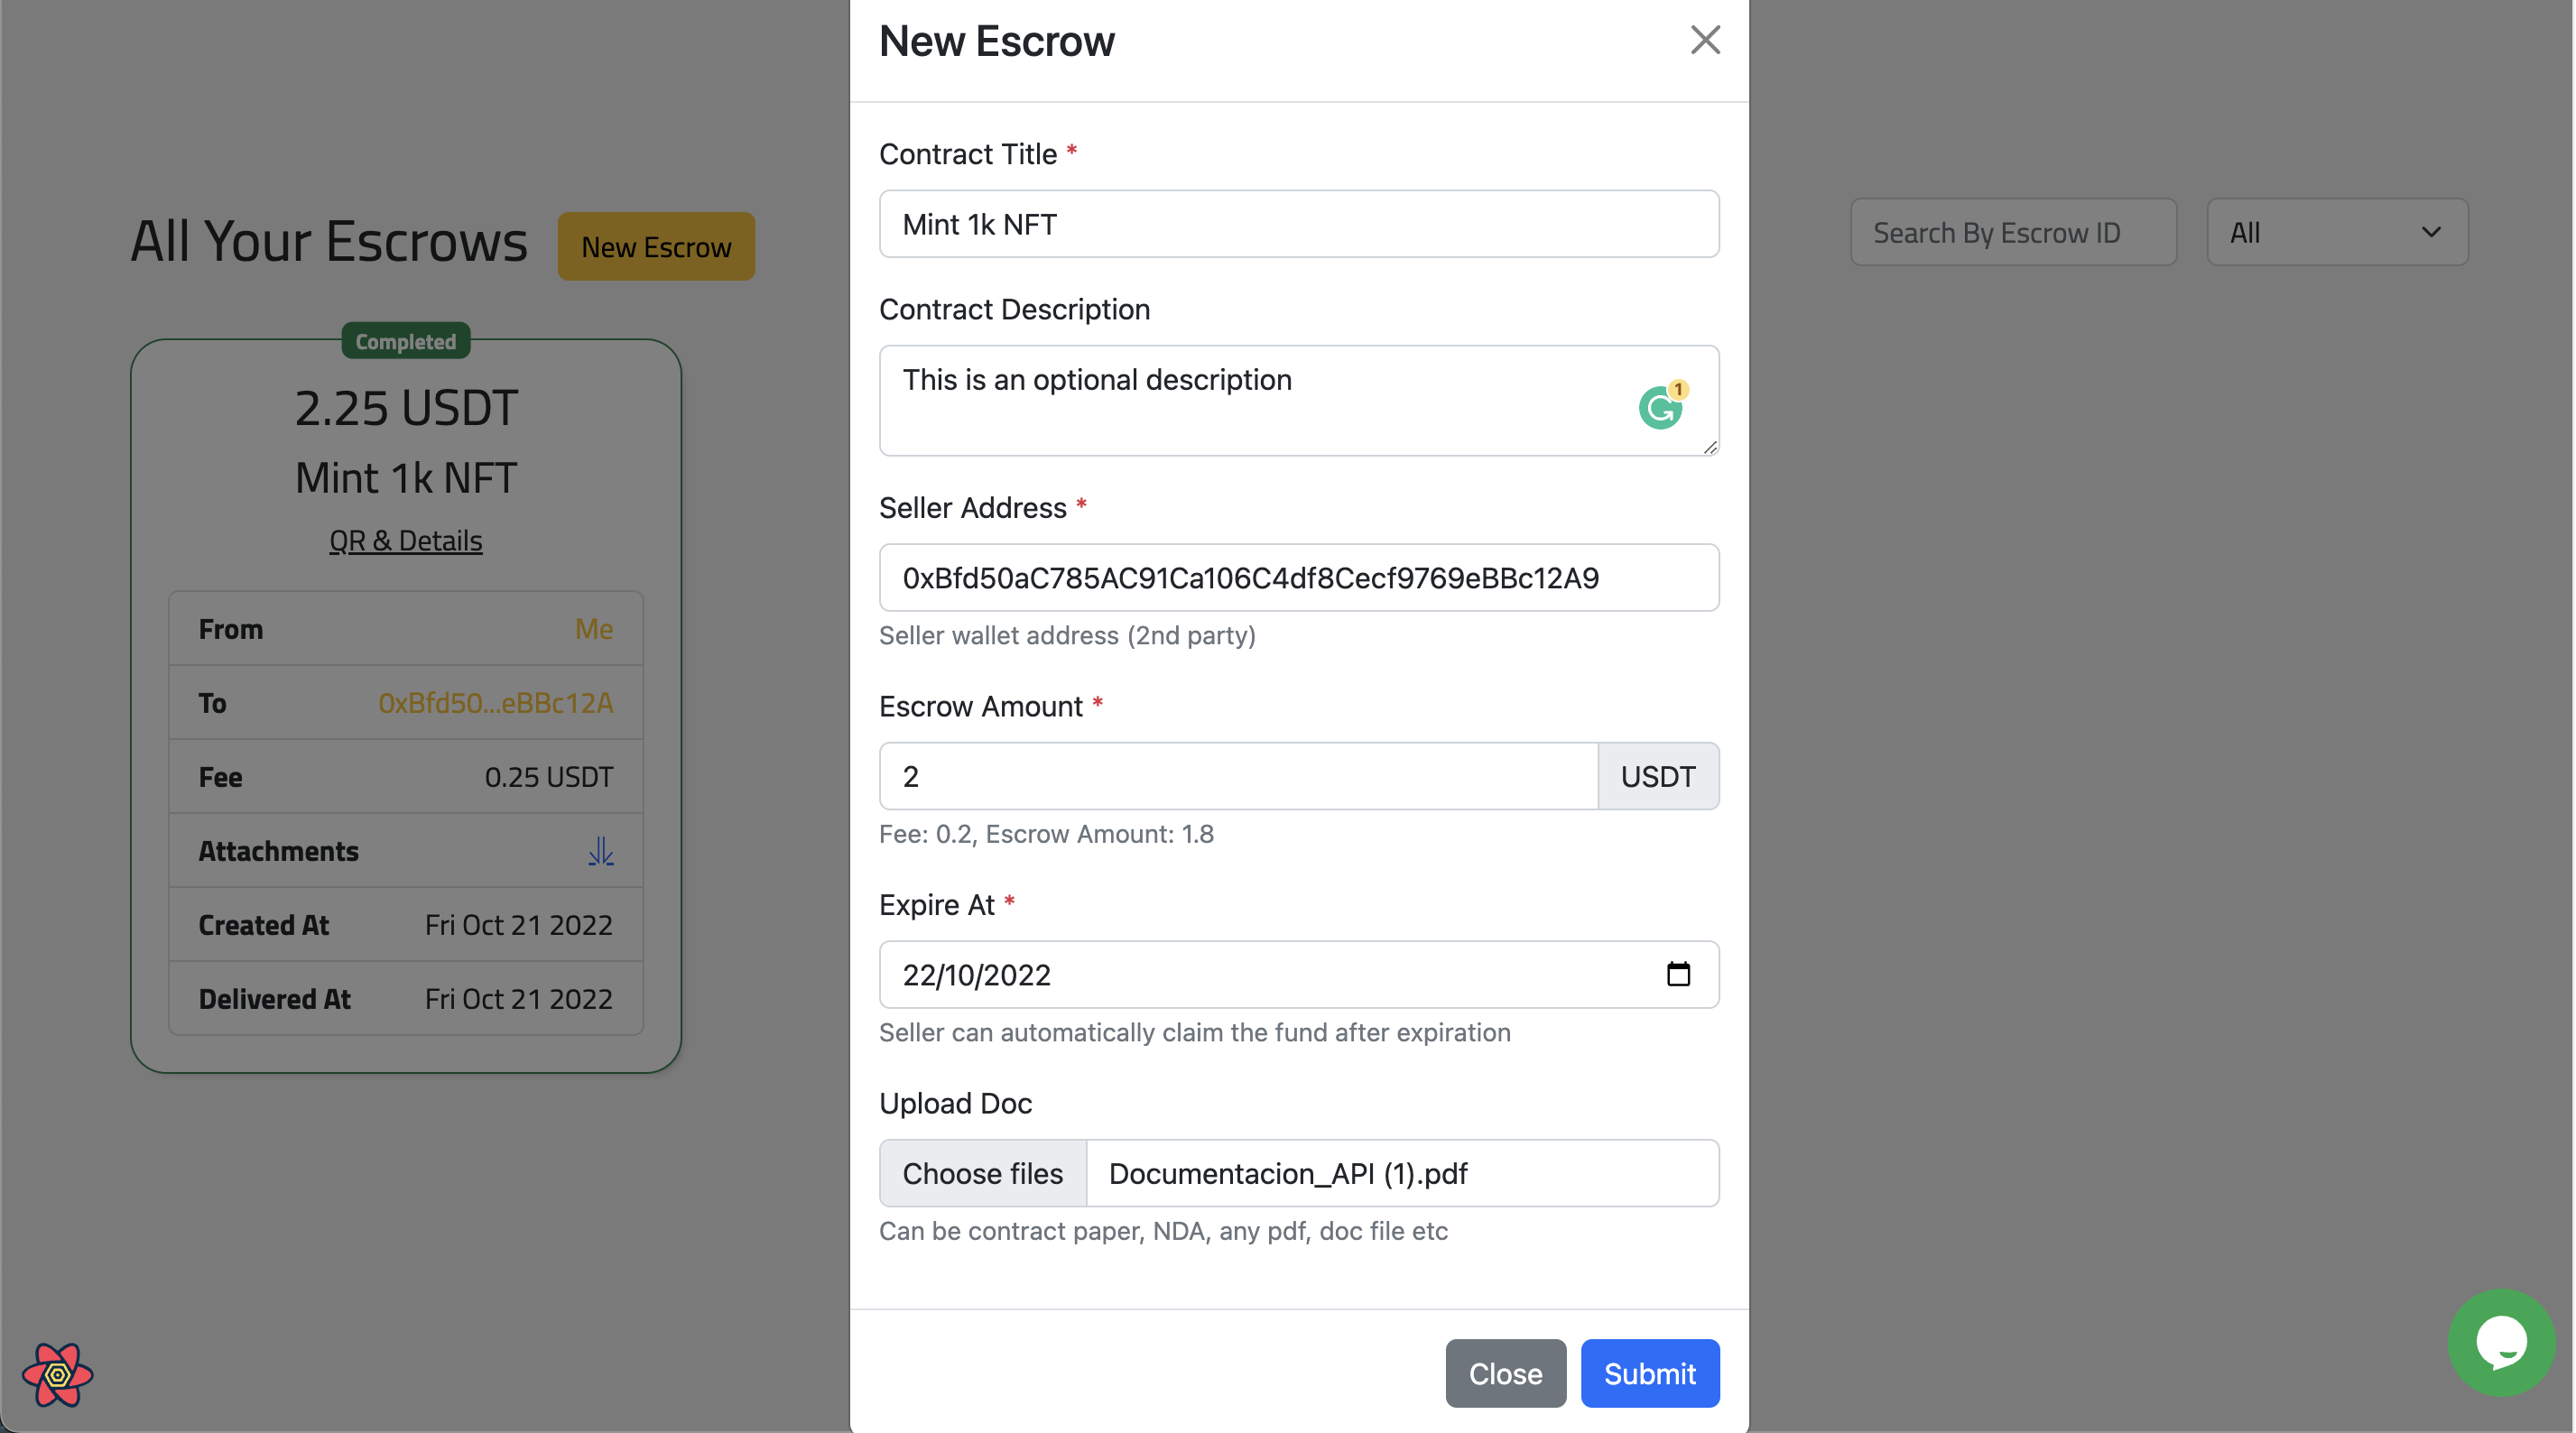
Please make sure you read Escrow Management carefully to learn the conceptual things about Escrow.
We recommend uploading small-sized PDFs or docs. Due to decentralized object storage, there is some limitation to it. It's not a limitation of Crypto Token Escrow.
After providing all the information click on submit. Processing will be started. Please do not close the browser or tab.
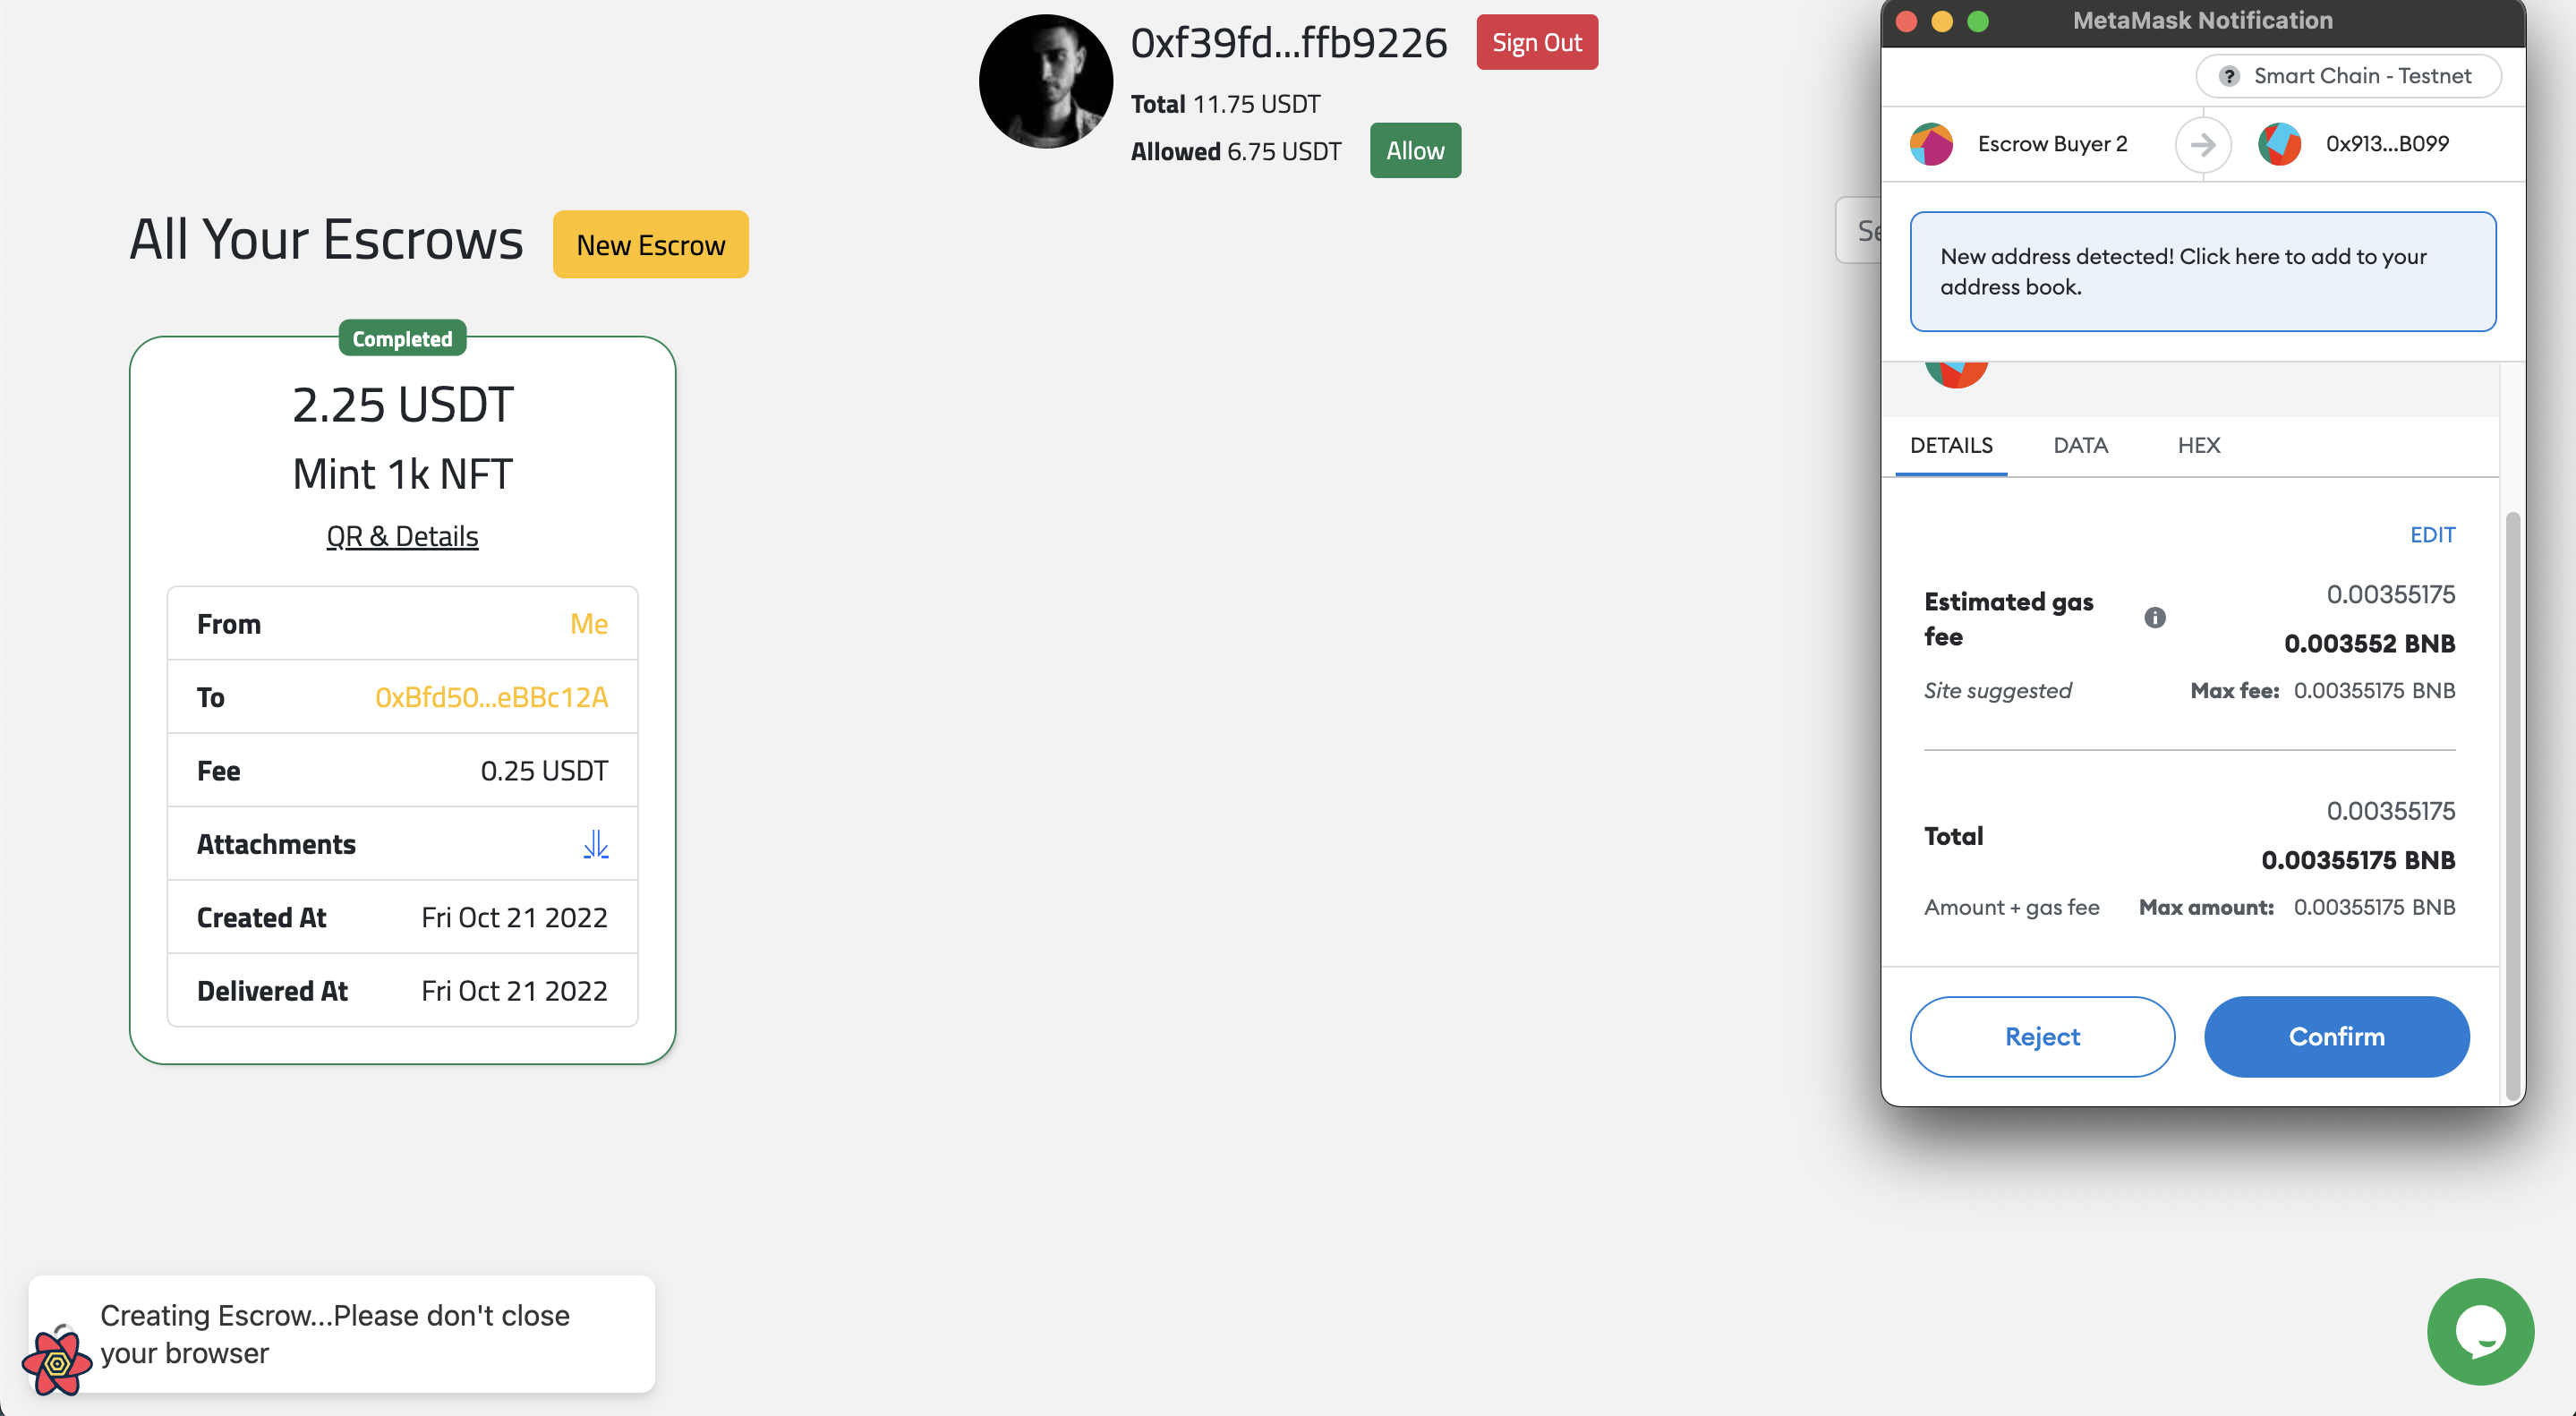
It will take some time to create the escrow. Time will depend on network status and other things.